Thanks for collabing with us!
Here's everything you need to know to design frames for Nufoto.
Here's everything you need to know to design frames for Nufoto.
01
Before You Start
Step 1
Download what you need
Templates
PSD
All Layouts
 Standard
 Couple
 Group
Group
 Std + coords
 Couple + coords
 Group + coords
Agreement
DOCX
Agreement Form
Logos
Symbol mark
 Blue
Blue
 Dark
Dark
 Light
Light
 Vector
Wordmark
 Vector
Logotype
 Blue
Blue
 White
White
 Black
Black
02
Key Dates
After signing the agreement
Design kickoff — start designing using the templates downloaded from the above links
2–3 weeks before release
Have your designs mostly done
gives us time for feedback rounds
gives us time for feedback rounds
1 week before release — Hard deadline
Final files need to be locked in, no more changes
03
What You're Designing
You'll be creating 3 frame layouts + 1 icon. Here's what each one is:

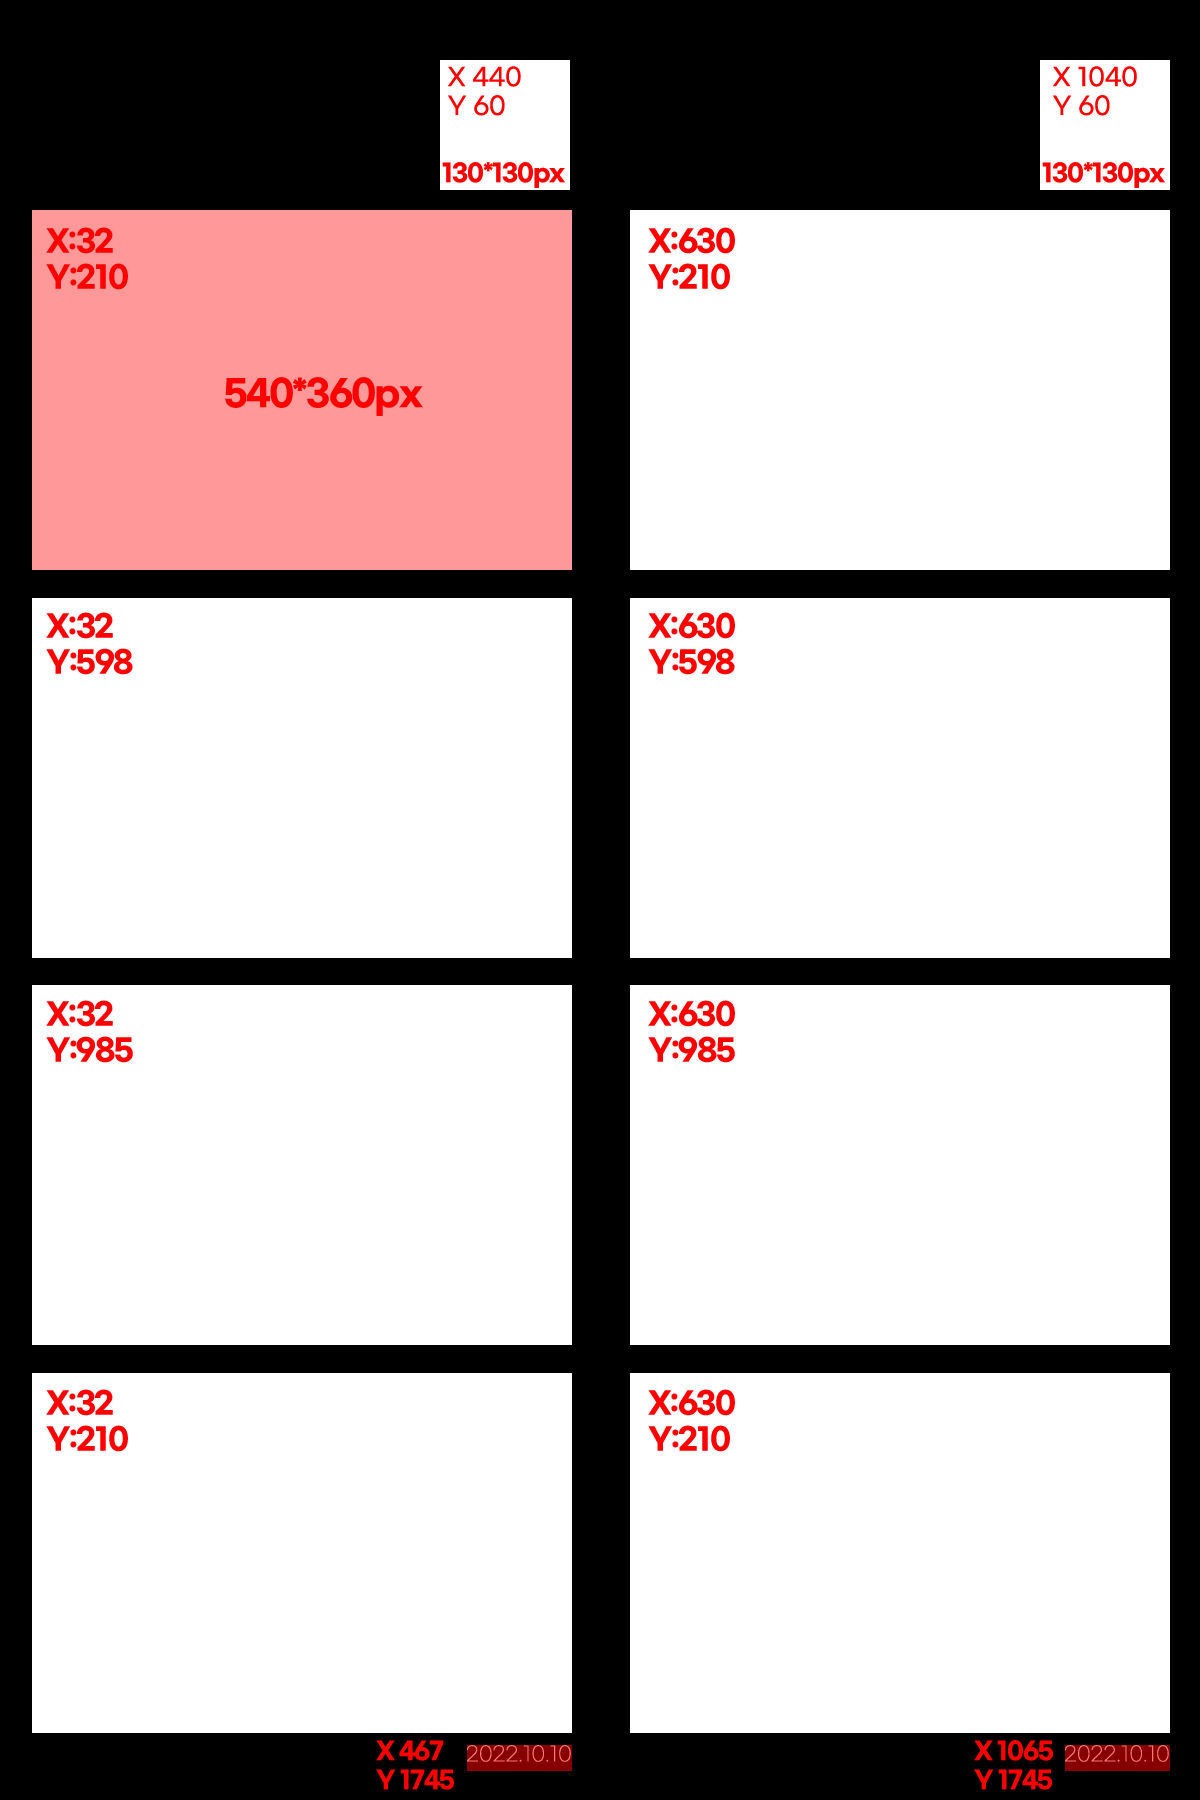
Standard
Layout2 col × 4 rows
Photo zone540 × 360 px
QR zones2
Strips2
Photo slots4

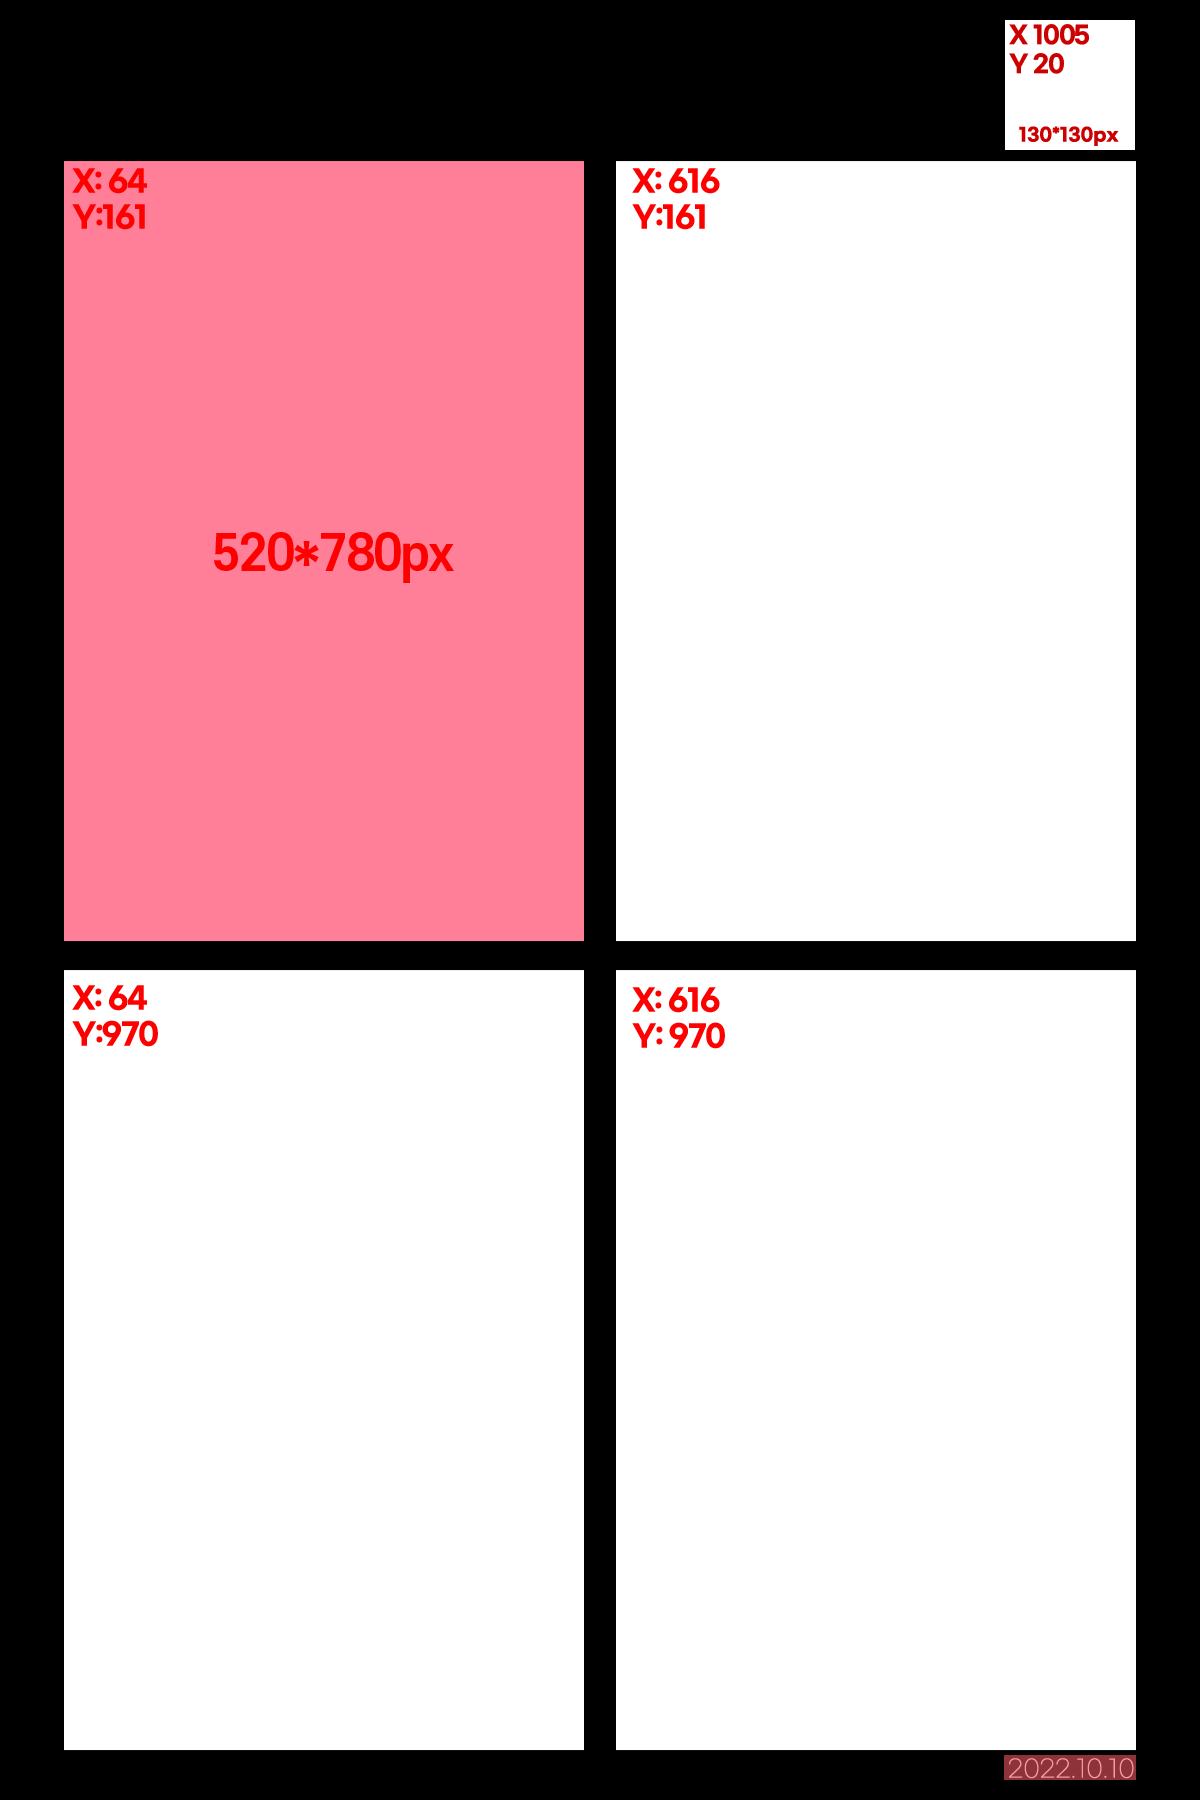
Couple
Layout2 col × 2 rows
Photo zone520 × 780 px
QR zones1
Strips2
Photo slots4

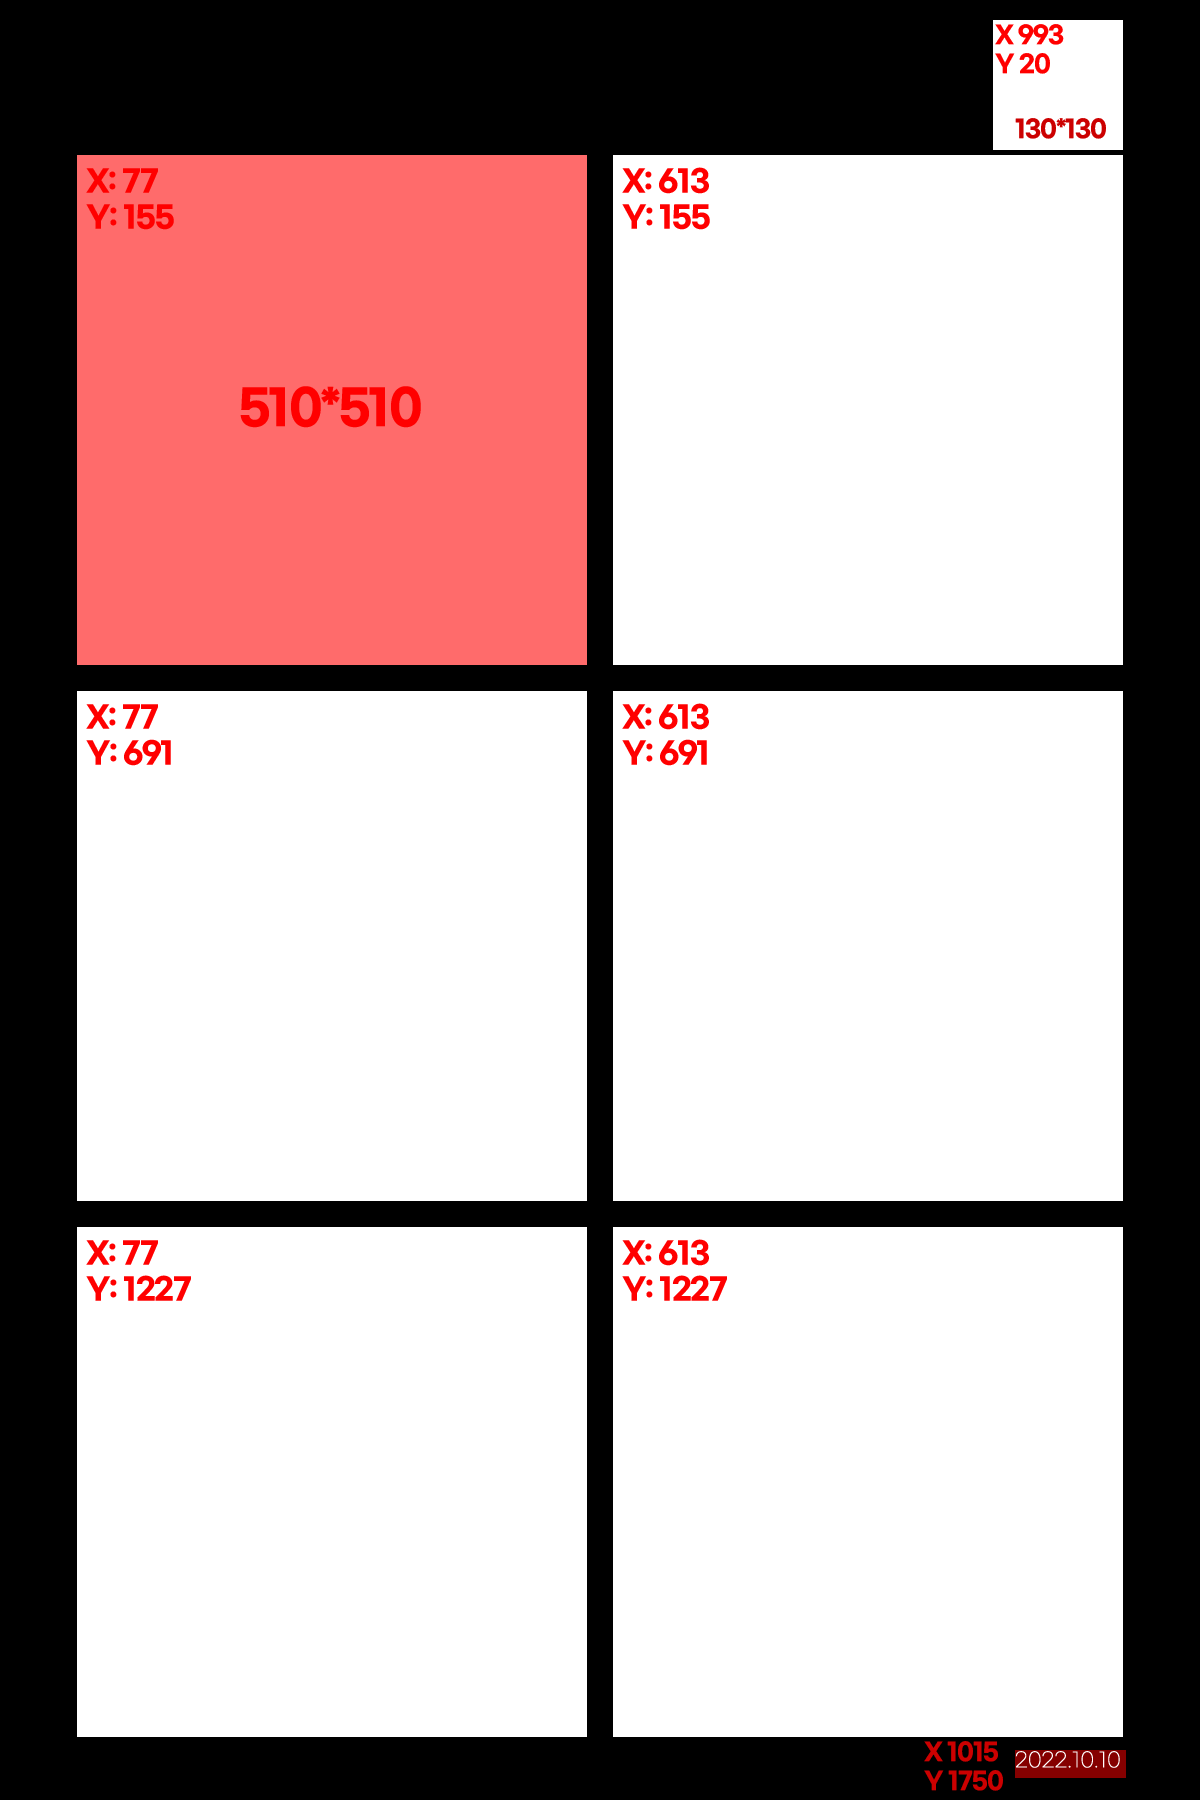
Group
Layout2 col × 3 rows
Photo zone510 × 510 px
QR zones1
Strips2
Photo slots6
Icon
Layout1 icon
Photo zone110 × 110 px
QR zonesN/A
StripsN/A
Photo slotsN/A
04
The Two Golden Rules
Critical
Mess these up and your frame won't work — seriously.
1
Keep photo areas transparent
Photo Zone = Transparent.
No white fill, no background colour, nothing.
It's okay to have some elements intentionally over the photo zone, but try not to overdo it — as it may cover the faces.
It's okay to have some elements intentionally over the photo zone, but try not to overdo it — as it may cover the faces.
2
Don't cover the QR code area
Don't forget that a QR code will be printed on the photo
Up to you whether you want to put elements there, but it will only show on the digital version.
05
Design Checklist
Check these off before you export.
06
Export Specs & Checklist
| Spec | Requirement |
|---|---|
| Format | PNG only Not JPG, not PSD, not PDF |
| Resolution | 300 PPI recommended |
| Frame layouts | Export at both 1200 × 1800 px and 600 × 900 px |
| Icon | 110 × 110 px |
07
Frame Validator
Test your frames before submitting — drop your PNGs and get instant feedback on specs, transparency, overlap, and QR clearance.
08
Submission Checklist
Do not submit until every box is ticked
Incomplete submissions will be sent back — save yourself a round trip.
Standard
✓
1200 × 1800 px (PNG)
✓
600 × 900 px (PNG)
✓
Frame Validator screenshot
Couple
✓
1200 × 1800 px (PNG)
✓
600 × 900 px (PNG)
✓
Frame Validator screenshot
Group
✓
1200 × 1800 px (PNG)
✓
600 × 900 px (PNG)
✓
Frame Validator screenshot
Icon
✓
110 × 110 px (PNG)
✓
Designed using the Icon PNG template — not a flat image
Requirements
✓
Nufoto logo or handle "nufoto.studio" included in each frame
✓
All files in a single folder (not separated by layout)